15 Expert Tips for Choosing the Right Exterior Paint System for Long Lasting Protection
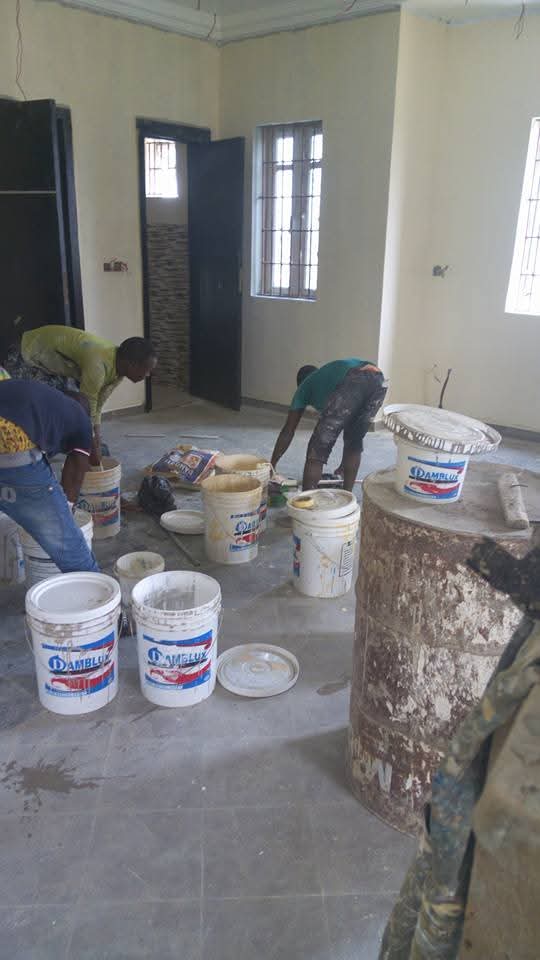
Choosing an exterior paint system is not just picking a color and buying a few cans. For long lasting protection, the right system is a set of decisions that work together, surface preparation, primers, topcoats, tools, application conditions, curing time, and ongoing maintenance. When any one piece is wrong, common failures appear early, peeling near edges, bubbling on sun baked walls, mildew on shaded sides, chalking, cracking, and fading.At Damblux Paint, we think of exterior coatings as a protective envelope engineered for your climate and your substrate. Use the 15 expert tips below as a practical checklist. Each tip focuses on a step that measurably improves durability, adhesion, and long term appearance.1) Start with a full surface diagnosis, not just a visual glanceBefore you choose primer or finish, identify what you are painting and what condition it is in. Most exterior failures happen because the coating system was chosen without understanding the substrate, existing paint layers, and moisture pathways. Walk the building slowly and note where problems repeat, bottom edges of siding, window sills, parapets, fascia boards, and north facing walls.Check for loose paint, chalking, cracks, soft wood, rust, efflorescence on masonry, algae staining, and glossy spots where adhesion will be weak. Confirm the substrate type in each area. Many homes combine wood trim, fiber cement, galvanized metal flashing, stucco, and masonry. One product rarely fits all without the right primer choices.
- Identify the substrate: wood, engineered wood, fiber cement, stucco, brick, concrete, metal, or previously painted surfaces.
- Identify the existing coating: latex, alkyd, stain, clear sealer, elastomeric, or unknown.
- Identify failure patterns: peeling from edges often indicates moisture or poor prep, blistering can indicate trapped moisture or heat.
- Document sun exposure and shade, because UV and moisture load drive product selection.
2) Make moisture control your first priorityExterior paint is not waterproofing in the structural sense. If bulk water is entering behind the paint film, even the best coating will fail. Long lasting protection depends on managing moisture sources before painting. Look for clogged gutters, missing kick out flashing, failed caulk joints, open end grain, and soil contact with wood or siding. Fix these issues first, then let substrates dry to an appropriate level.For wood, a moisture meter is one of the most valuable tools you can use. Painting wet wood traps moisture, which can cause blistering, peeling, and fungal growth. For masonry, understand that moisture can travel through the wall and exit through the paint film. A coating must be compatible with this vapor movement.
- Repair roof leaks, gutters, downspouts, flashing, and grading before coating work begins.
- Do not paint wood that is damp, or has recent rain exposure without adequate drying time.
- On masonry, avoid non breathable coatings unless the wall is designed and detailed for it.
- Address interior humidity sources if they drive moisture into exterior walls.
3) Choose the right sheen and resin for the job, not the one you are used toExterior durability is strongly influenced by resin chemistry and sheen level. Higher quality resins resist UV degradation, hold color longer, and maintain flexibility during temperature swings. Sheen affects how easily dirt sheds and how visible surface defects will be. A flat finish can hide imperfections but may retain dirt more easily in some environments. Satin and low sheen options often balance cleanability with a forgiving look. Semi gloss is common for trim because it resists moisture and is easier to wash, but it can highlight poor preparation.For many modern exteriors, 100 percent acrylic latex topcoats offer strong exterior performance, including flexibility and adhesion. Specialized options like elastomeric coatings can bridge hairline cracks on masonry or stucco, but they must be used only when the substrate and moisture conditions are appropriate.
- Use premium acrylic resins for broad exterior walls where UV resistance and flexibility matter.
- Select satin or low sheen for siding when you want a balance of appearance and washability.
- Reserve semi gloss for trim, doors, and areas needing frequent cleaning.
- Consider elastomeric only for stable stucco or masonry where crack bridging is needed.
4) Match the paint system to your substrate, then to your climateThe same exterior paint that performs well on primed wood may fail on alkaline concrete, or on slick metal. Substrate compatibility comes first. Next, tune the system to your climate. Hot sunny regions need excellent UV stability and heat tolerance. Coastal areas need salt resistance and strong corrosion protection on metals. Wet, shaded environments need mildew resistance and breathability. Freeze thaw climates need flexibility to resist cracking.Think of exterior paint selection as engineering for stress. UV light degrades binders, rain and dew drive moisture cycling, and temperature swings cause expansion and contraction. Choose products designed for those stresses, and apply them at the correct film thickness.
- On stucco and masonry, use primers and finishes designed for alkaline surfaces.
- In high UV zones, prioritize color retention and fade resistance in the topcoat.
- In coastal zones, add dedicated metal primers on steel and galvanized components.
- In humid zones, choose coatings with strong mildew resistance and plan for cleaning cycles.
5) Do adhesion testing when the existing coating is unknownMany repaints fail because the new coating does not bond well to old paint, chalky residues, or glossy surfaces. If you do not know the existing coating history, do a simple adhesion test on multiple areas. Clean a small spot, lightly sand it, apply a test patch of your intended primer and topcoat, allow it to dry fully, then perform a cross hatch cut and tape pull test. If paint releases easily, you need more surface preparation, a different primer, or in some cases removal of failing layers.Also identify whether older layers are oil based. Latex can usually be applied over properly sanded and primed oil paint, but skipping the primer often causes peeling. Adhesion problems are expensive, because they appear months after the project, when the paint film is stressed by weather.
- Test several locations, sunny and shaded sides behave differently.
- Chalking requires washing and often a bonding primer.
- Glossy surfaces require deglossing, sanding, and a suitable primer.
- When in doubt, use a high quality adhesion promoting primer and confirm with testing.
6) Treat surface preparation as part of the system, not a separate taskPrep work determines how long the coating will last. Washing, scraping, sanding, feathering edges, patching, and dust removal are not optional extras. Paint is thin compared to the defects it must cover. If you paint over loose edges, you are sealing in a future failure point. If you paint over dirt, oils, or mildew, the coating may not bond and stains can bleed through.Effective prep creates a stable, clean, and uniformly absorbent surface. That uniformity matters, because patchy porosity causes patchy sheen, flashing, and uneven film formation. Plan the prep steps in writing, by substrate, and include dry times between washing, repairs, and priming.
- Wash to remove dirt, salts, chalk, and biological growth, then rinse thoroughly.
- Scrape all loose paint to a firm edge, then sand to feather transitions.
- Repair cracks and holes with exterior grade fillers compatible with the substrate.
- Remove sanding dust before priming, dust reduces adhesion.
7) Use the right primer, and use it only where it is neededPrimer is a function, not a brand preference. It can improve adhesion, seal porous surfaces, block stains, control tannin bleed in wood, inhibit rust on metal, and neutralize substrate issues like mild surface alkalinity. A common mistake is using a general purpose primer everywhere, which can be unnecessary in some areas and inadequate in others. Another common mistake is skipping primer on repairs, raw wood, and patched zones, which often leads to visible flashing or early failure.Choose primer by the problem you are solving. For wood with tannins, a stain blocking primer helps. For metal, a corrosion inhibiting primer is essential. For chalky old coatings, a bonding primer can lock down residual chalk. For masonry, use primers designed for alkaline conditions and vapor movement.
- Prime bare wood and end grain, these areas absorb moisture and need sealing.
- Spot prime repairs, exposed substrate, and sanded through areas before topcoating.
- Use dedicated rust inhibiting primers on ferrous metal and appropriate primers on galvanized metal.
- Choose masonry primers that handle alkalinity and reduce uneven absorption.
8) Do not ignore end grain, edges, and horizontal surfacesMost moisture enters at the weakest points, end grain of wood, cut edges of siding, joints, and horizontal surfaces that hold water. These areas are where paint fails first. A long lasting exterior paint system treats these as critical zones. Seal end grain thoroughly, consider extra primer, and apply full coverage topcoat. Do not apply thin coats on these areas. Thin film thickness reduces barrier performance and accelerates erosion.Horizontal surfaces like window sills, railings, porch ceilings near open edges, and trim caps face intense water exposure and UV. They often need higher performance coatings and more maintenance. If possible, improve drainage and slope so water does not sit.
- Seal end grain on trim and siding cuts, it is a major moisture pathway.
- Apply extra attention to lower edges where splashback occurs.
- Rebuild or replace rotted edges before painting, paint cannot stabilize failing wood.
- Consider more frequent maintenance cycles for horizontal and near horizontal elements.
9) Select caulks and sealants that are paint compatible and long livedExterior gaps and joints move with temperature changes. If you use brittle or low grade sealants, cracks form and water gets behind the paint. Choose high quality, paintable sealants rated for exterior movement. Pay attention to where you should not caulk, for example certain siding systems rely on drainage paths. Caulking mistakes can trap water. Follow the building design and manufacturer guidance.Also respect cure times. Painting over uncured sealant can cause cracking, poor adhesion, or discoloration. Use the correct bead size, tool it properly, and ensure surfaces are clean and dry.
- Use paintable exterior sealants designed for movement and UV exposure.
- Do not caulk weep holes, drainage gaps, or engineered ventilation details.
- Allow sealants to cure as specified before priming or topcoating.
- Caulk after priming when appropriate, this can improve adhesion at the joint.
10) Pay attention to film thickness and coverage ratesDurability is strongly tied to dry film thickness. If you spread paint too far to save material, you get a thin film that erodes quickly, has reduced water resistance, and may not form a continuous protective layer. If you apply too thick in one coat, you can get sagging, solvent or water entrapment, wrinkling, and slow curing. Follow the manufacturer coverage rate and recommended number of coats, and verify by measuring how much product you used per area.Two proper coats usually outperform one heavy coat, because they build an even film and reduce pinholes. This matters on porous substrates like stucco and textured siding, which can hide holidays, tiny missed spots that allow water intrusion.
- Follow coverage guidelines, they are based on achieving the correct dry film thickness.
- Apply two uniform coats for better film continuity and long term durability.
- Back roll sprayed coatings on rough substrates to improve penetration and coverage.
- Inspect for holidays around edges, corners, and texture peaks.
11) Choose application tools and methods that fit the surface textureApplication method affects adhesion and film build. Spraying can be fast and can produce a smooth finish, but it may not push paint into pores and texture unless you back brush or back roll. Rolling can build film well on flat or moderately textured surfaces. Brushing is ideal for trim, edges, and detailed profiles because it works paint into crevices and improves wetting. A durable exterior system often uses a combination, spray and back roll for walls, brush for trim, and roller for certain panels.Tool quality also matters. Cheap brushes shed, leave streaks, and hold less paint. The right roller nap length ensures paint reaches valleys on textured surfaces. For example, stucco often needs a thicker nap to load and release enough coating.
- Use brush and roller where penetration matters, especially on rough wood and cracks.
- If spraying, back roll or back brush to improve adhesion on porous substrates.
- Match roller nap to texture, smoother surfaces need shorter nap, rougher surfaces need longer nap.
- Maintain a wet edge to prevent lap marks and uneven sheen.
12) Time the project around weather, temperature, dew, and sun angleWeather is a core part of the exterior paint system. Most products have minimum and maximum application temperatures, and some have special cold weather formulations. Painting when it is too cold slows curing and can lead to wash off, poor adhesion, and surfactant leaching. Painting in hot direct sun can cause the surface to be much hotter than the air, leading to fast drying, lap marks, and reduced film formation. High humidity and evening dew can also affect drying and create water spotting or dull areas.Plan daily work by sun angle. Paint shaded sides first, then move with the shade. Avoid painting late in the day when dew is expected before the film becomes rain ready. Check wind, because wind can dry paint too quickly and blow dust onto wet surfaces.
- Follow product temperature limits, including surface temperature, not just air temperature.
- Avoid painting in direct hot sun when possible, move with the shade.
- Allow enough time before dew or rain, especially for waterborne coatings.
- Watch humidity and wind, both affect drying and defect risk.
13) Build a color and UV strategy, especially for deep tonesColor is not only aesthetic. Dark and highly saturated colors absorb more heat and can stress coatings and substrates. On some materials, heat can increase expansion and contraction, leading to cracking at joints or warping in certain sidings. Deep colors also show fading more quickly if the pigment and resin system is not designed for UV exposure. If you want rich colors, choose premium exterior paints engineered for color retention and consider lighter adjacent trim or design choices that reduce heat load.Also consider the orientation of the building. South and west facing walls typically take the most sun and can fade faster. Testing a sample area and observing it at different times of day helps prevent surprises. When repainting, be cautious about drastic color changes that may require additional coats for hiding and uniformity.
- Use high performance exterior coatings for deep and vivid colors to improve fade resistance.
- Consider heat build up on dark colors, especially on sun exposed walls and trim.
- Expect additional coats when making significant color changes for consistent hiding.
- Test samples on multiple orientations, light changes across exposures.
14) Plan for details, transitions, and mixed materialsTransitions are where systems fail, wood to masonry, siding to trim, metal flashing to wood, and around doors and windows. Each material expands differently and has different adhesion needs. A durable exterior paint system addresses transitions with appropriate primers and sealants, and with careful masking and cut in work. Do not rely on topcoat alone to solve compatibility issues.For example, metal flashing should be cleaned, lightly abraded as appropriate, and primed with a metal primer before topcoating. If you topcoat bare or oxidized metal directly, corrosion can creep under the film. On masonry meeting wood trim, ensure the masonry is properly sealed or primed to prevent moisture transfer and staining that can affect the trim paint edge.
- Prime each substrate with a compatible primer, especially at junctions and transitions.
- Detail work matters, cut in cleanly and ensure continuous film at edges.
- Do not paint over heavy oxidation, rust, or salts without proper removal and treatment.
- Use compatible sealants at transitions to manage movement and water entry.
15) Treat maintenance as the final layer of the paint systemThe best exterior paint system lasts longer when it is maintained. Dirt, pollen, salts, and mildew feed into film degradation. Gentle periodic washing reduces staining and helps you spot early issues like hairline cracks, failing caulk, or localized peeling. Addressing small defects early prevents water intrusion that can cause large scale paint failure and substrate damage.Create a simple maintenance plan by exposure. The shaded damp side may need mildew checks. The sunny side may need inspections for chalking and fading. Trim at roof edges may need caulk renewal sooner. If you keep records, including product names, color codes, batch information, and the date applied, future touch ups and repaints become easier and more consistent.
- Wash exterior surfaces periodically to reduce dirt and biological growth.
- Inspect annually for caulk failure, peeling at edges, and water staining.
- Touch up promptly, small repairs prevent moisture intrusion and bigger failures.
- Keep a coating record for faster, more accurate maintenance and future repainting.
Putting it all together, a practical selection checklistIf you want a simple way to apply these tips, use this ordering when choosing your exterior paint system. First, fix moisture and building defects. Next, decide substrate by substrate what prep and primer is required. Then pick topcoats based on climate stress and appearance goals. Finally, schedule application around weather and commit to a maintenance plan.
- Moisture and repairs first, paint second.
- Prep until the surface is clean, sound, and evenly absorbent.
- Prime for the specific problem, adhesion, stain blocking, rust control, or masonry conditioning.
- Topcoat for UV, flexibility, and washability based on exposure.
- Apply at proper film build with correct tools, and maintain it with inspections and cleaning.
Common exterior paint failures and what they usually meanWhen you understand typical failure modes, you can choose a better system. Peeling usually indicates adhesion problems, moisture intrusion, or painting over chalk and dirt. Blistering can indicate moisture vapor pressure, heat, or painting wet surfaces. Chalking can be normal aging, but excessive early chalking often points to low quality resin or thin film thickness. Mildew and algae indicate persistent moisture and shade combined with nutrients on the surface. Cracking can indicate inadequate flexibility, aged brittle layers, or movement at joints.
- Peeling at edges often points to water entry, unsealed end grain, or missing primer.
- Bubbles and blisters often point to trapped moisture, painting too soon after rain, or hot surface temperatures.
- Stains bleeding through can point to tannins, rust, water marks, or soot without stain blocking primer.
- Powdery residue can point to chalking, which may require washing and a bonding primer before repainting.
How Damblux Paint recommends you choose with confidenceDamblux Paint encourages homeowners, contractors, and facility managers to choose systems, not single products. Bring photos, note the substrate types, and share your local climate conditions and exposure. With that information, you can select primers and topcoats designed to work together, schedule application windows that support proper curing, and plan maintenance that extends service life. Long lasting protection is achievable when every layer, from substrate repair to the final coat, is chosen and applied intentionally.If you apply these 15 tips, you will avoid the most common causes of premature failure and you will get a finish that stays attractive while protecting the building for years.Damblux Paintexterior paint systempaint manufacturerhouse exterior paintingprimer selectiontopcoat durabilitysurface preparationmildew resistanceUV resistance